
The workspace is the user's personal work space within the Data Portal. It centralizes and simplifies the management of the objects the user needs to work with regularly, allowing them to group them, review them, and operate on them together. It is a non-shared space: each user has their own workspace, independent from everyone else's, where they can reserve objects of any type and status and add or remove them as needed.
In addition to being an area for organization and consultation, the workspace is an operational environment from which to run advanced actions on sets of objects (metadata download, bulk editing, bulk submission for validation…). It is especially useful for preparing data governance tasks, keeping assets of interest organized, and speeding up loading, editing, or validation processes.
It is available from the briefcase icon in the navigation menu, only for users whose role has workspace access permission. See Access to the Platform modules.
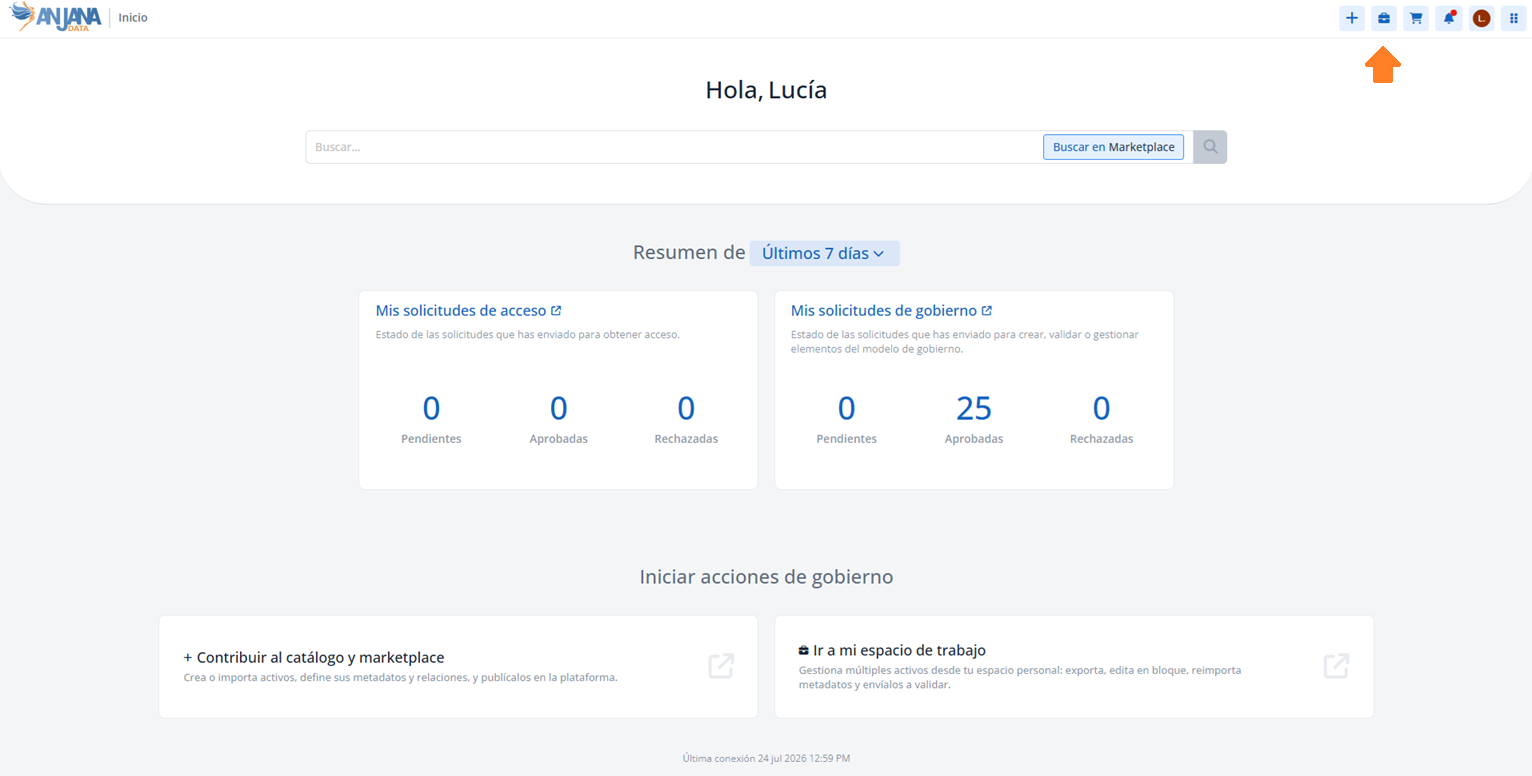
Accessing the workspace
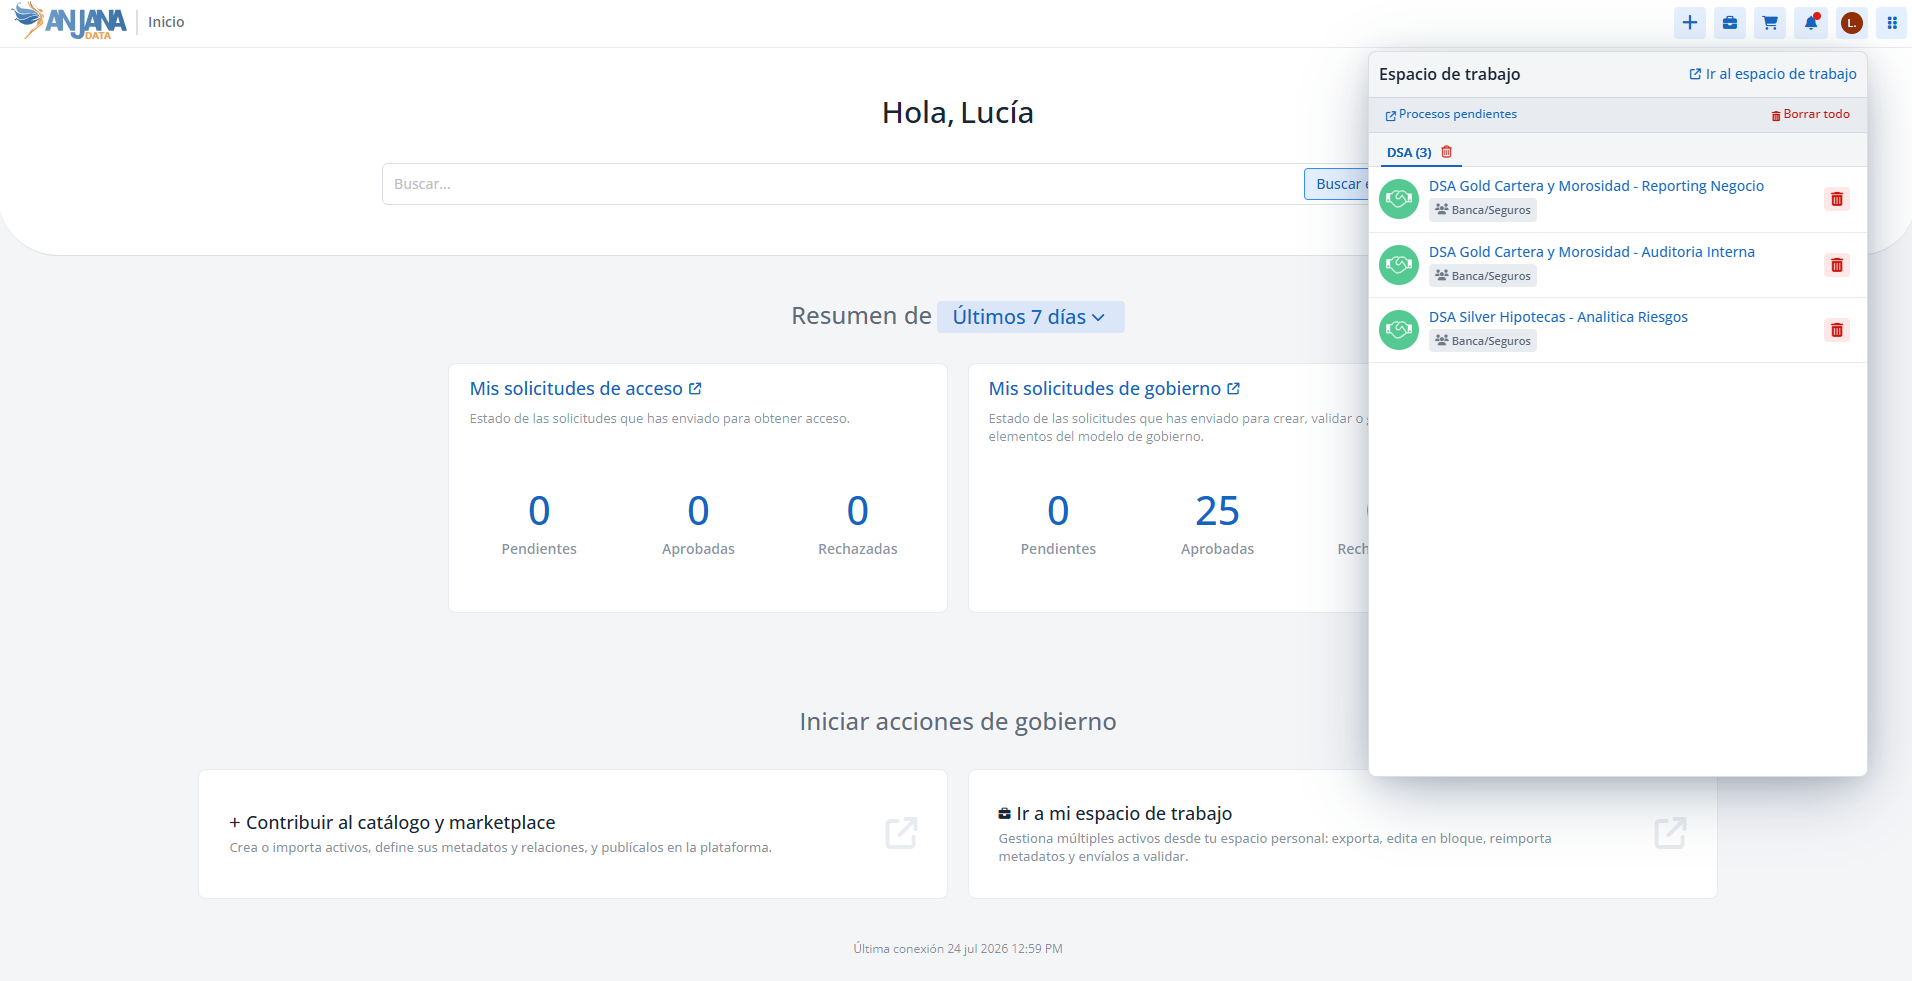
Clicking the briefcase icon opens a panel from which the user can navigate to their Workspace or their Pending processes. The panel shows the objects that have been added, grouped by subtype, and allows the user to delete a single object, all objects of the same subtype, or empty the workspace completely.
To enter the workspace, click the link at the top of the panel. Once inside, the user finds the list of objects, which can be sorted and filtered using the same filters configured in the Portal.
Adding objects to the workspace
There are two ways to add objects to the workspace:
-
In bulk, from the Catalog and the Marketplace.
-
Individually, from each object's detail view.
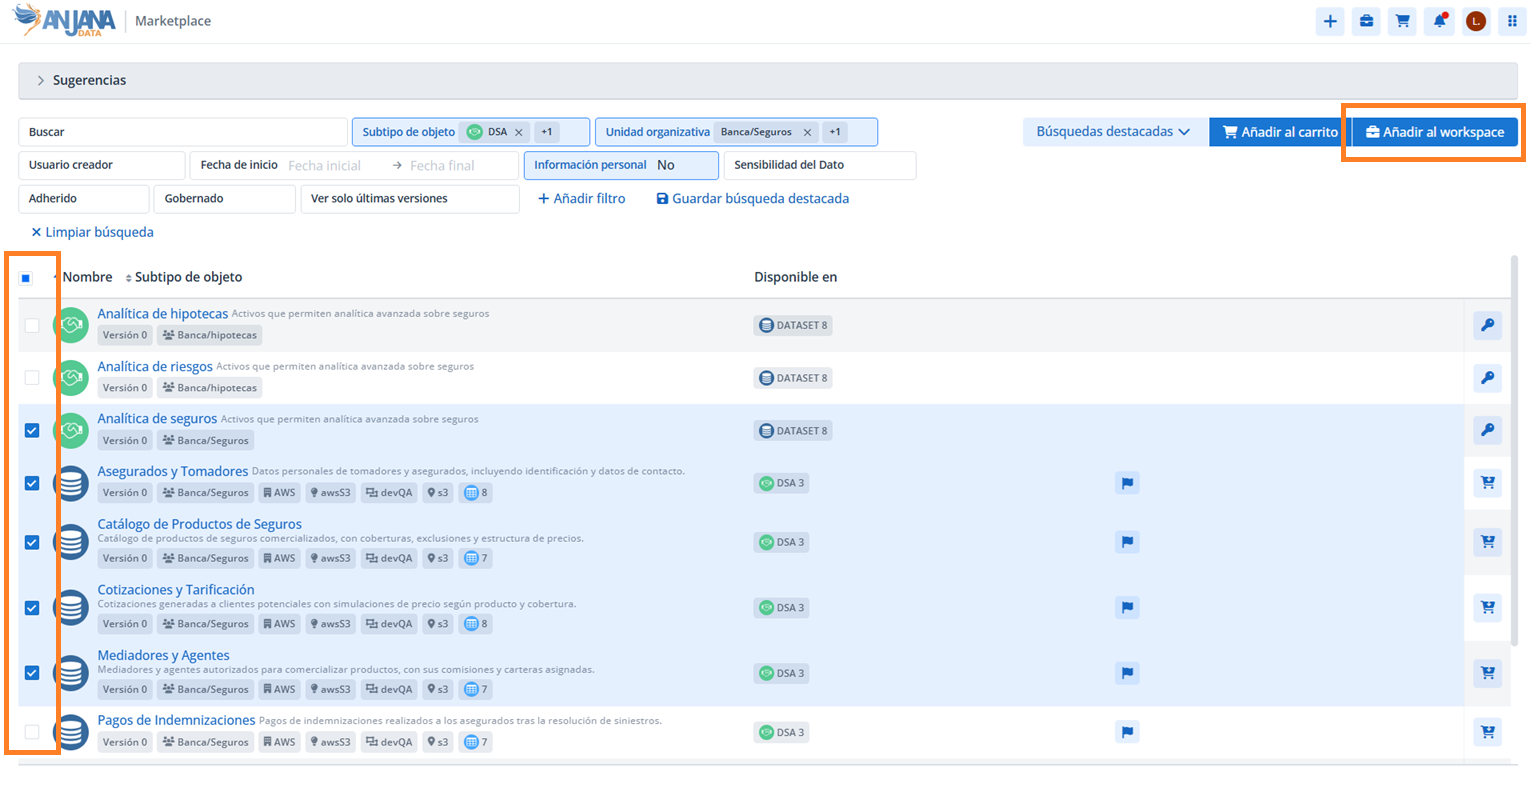
In bulk (from the Catalog and the Marketplace)
When you need to work with a large set of objects located using the search tool:
-
Perform a search: use the search tool and filters of the Catalog or the Marketplace to locate the objects.
-
Enable selection mode (if not already enabled): click "Select objects" at the top of the list; a selector will appear on each row.
-
Select the objects: one by one, or all filtered objects using the checkbox at the top of the table.
-
Add them to the workspace: click "Add objects to workspace".
At any time it is possible to cancel the selection, which removes the selector from each row.
Individually (from an object's detail view)
-
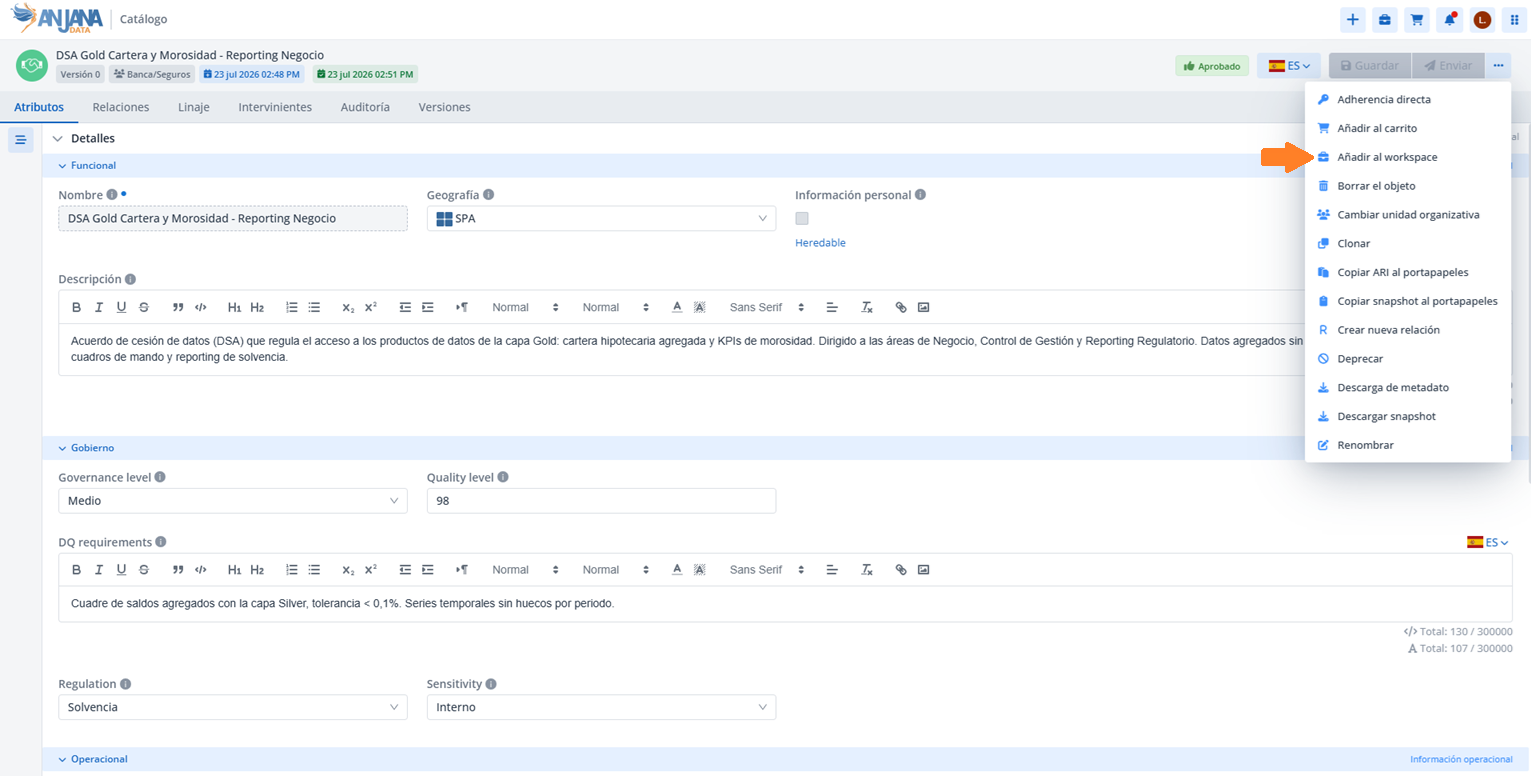
Go to the object's detail view (dataset, report, term, process…).
-
Open the actions menu.
-
Select "Add to workspace"; you will see a message confirming that the object has been added successfully.
Removing objects from the workspace
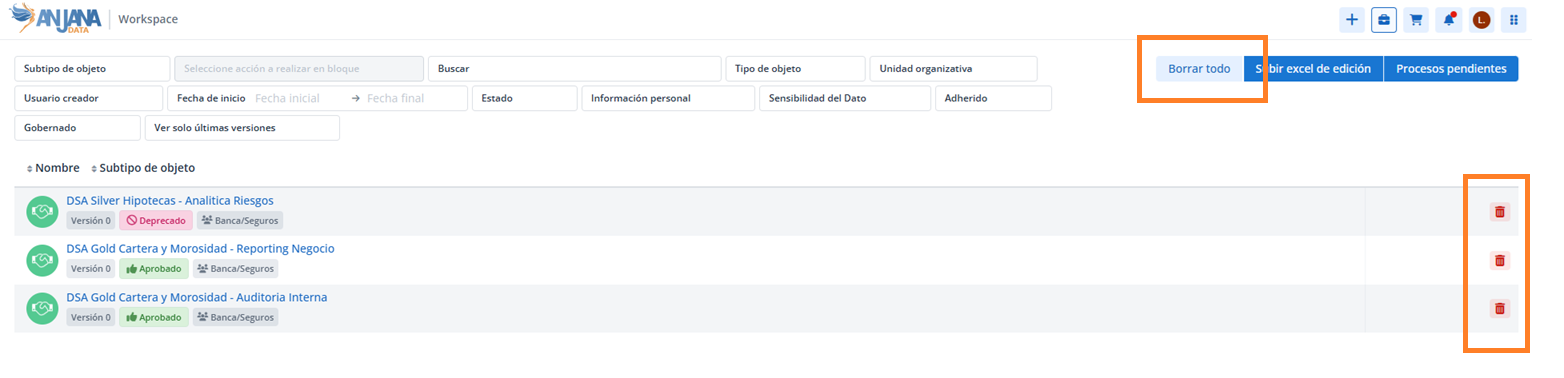
Both from the preview and from the list, the user can remove objects individually or all at once.
Actions on workspace objects
From the workspace, bulk actions can be performed on the objects:
-
Metadata download. See Metadata download.
-
Editing with Excel, in two steps (download for editing and upload of the edited Excel file). See Editing with Excel.
-
Bulk attribute editing (only for users with
API_ADMINpermission). See Bulk attribute editing. -
Bulk submission for validation. See Submission for validation.
All these actions are enabled by selecting an object subtype, except for uploading the Excel file, which does not require a specific selection. To narrow down the objects the action applies to, filters can be used, and the options selected by default can be checked or unchecked.