Kit limitations
It is necessary to review this section to take into account the limitations when using the deployment kit.
-
The kit allows multiple machine inventories but is not capable of handling multiple Anjana installations with different configurations. Multiple kits will be needed for different environments.
-
The machine where the kit is deployed must belong to a single Anjana environment, as it will be provisioned and undergo changes according to the Anjana environment being managed. It will not be possible to control multiple Anjana installations from a machine containing the kit.
-
In case the installation fails and relaunching the kit also fails, it will be advisable to re-provision the machine from scratch and start over.
-
The anjana user is a reserved user and cannot exist on the machine.
Requirements
Required connectivity
The kit will download all necessary resources from the Anjana Data central repository via HTTPS protocol and port 443 against the server releases.anjanadata.com, so it will be necessary to have connectivity from the servers to be provisioned to this service.
Access and credentials must be requested at cs@anjanadata.com.
Environment setup
Starting from 25.a1, a setup script is included that will condition the deployment machine intended for running the Anjana ansible kit with the following resources:
-
Download of the kit for the version indicated in the script itself.
-
Installation of packages and dependencies required for execution.
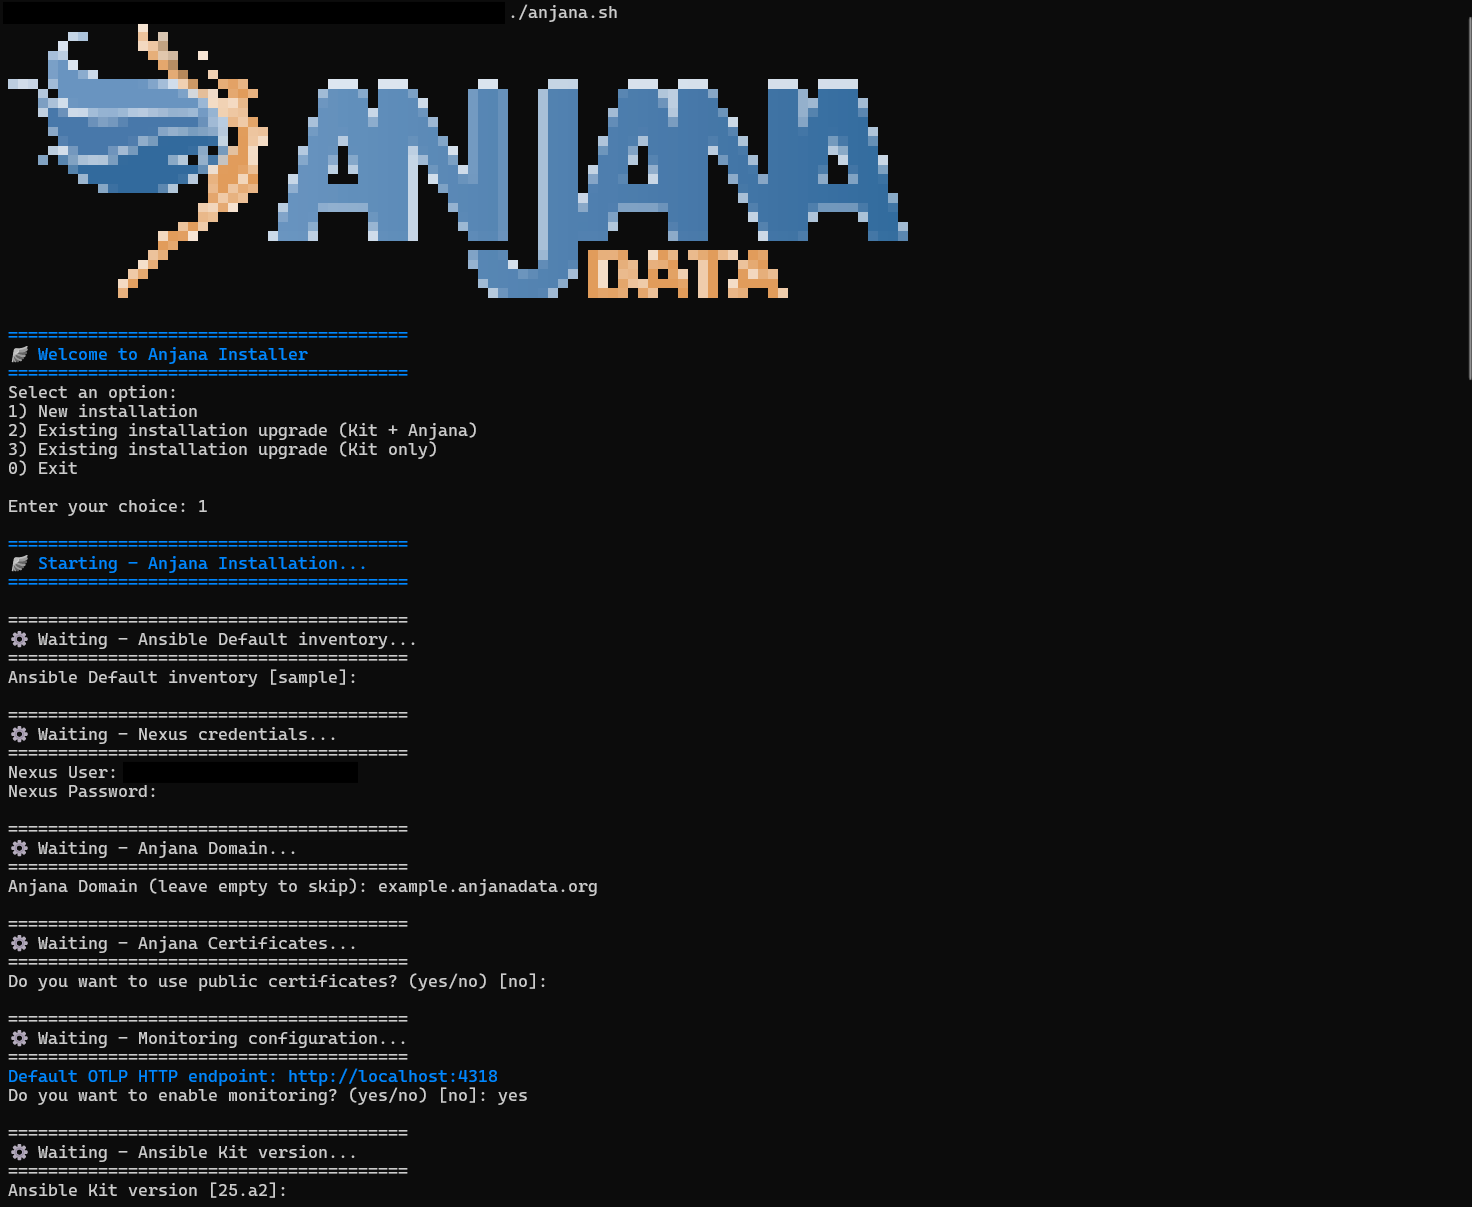
The script can be obtained here: anjana.sh
Once downloaded, it is necessary to place it inside the machine to be provisioned. It can be executed using the following command:
chmod +x anjana.sh
./anjana.sh
The setup script will require the following information:
-
Installation mode, new environment or existing Anjana environment.
-
Inventory, default is sample, but the inventory to be used will be specified even if it has not been created yet. It will NOT be possible to adjust it later by relaunching this script.
-
Credentials, previously requested from cs@anjanadata.com.
-
Domain, required for the frontend and communication between microservices.
-
Certificate, corresponding to the chosen domain in case it is to be specified manually.
-
Monitoring, to use the Open Telemetry Java instrumentation agent provided by the installer.
-
Version, default is the most recent one corresponding to the setup script.
For RedHat it is necessary that SELinux is in Permissive or Disabled mode.
From 25.a2 the required certificate is automatically generated as self-signed by the installation.
If a public certificate is to be used, it needs to be placed in the /opt/common/anjana-certs/ directory on all instances that make up the Anjana environment.
The certificate should look like this:

Required adjustments
The kit comes pre-configured to deploy Anjana according to the recommended settings; adjustments will be needed depending on the environment according to the following guidelines:
The example inventory sample will be replaced during kit updates, so it must be used as a base to generate custom inventories before continuing.
Singlenode: For Singlenode environments, no modification or additional adjustments are required; the sample inventory provided in the kit can be used.
Distributed / Balanced: For Distributed or Balanced environments, or when an Ansible node different from the Anjana environment node is to be used, it will be necessary to use the sample inventory provided or generate a new one by cloning it to make the following adjustments:
-
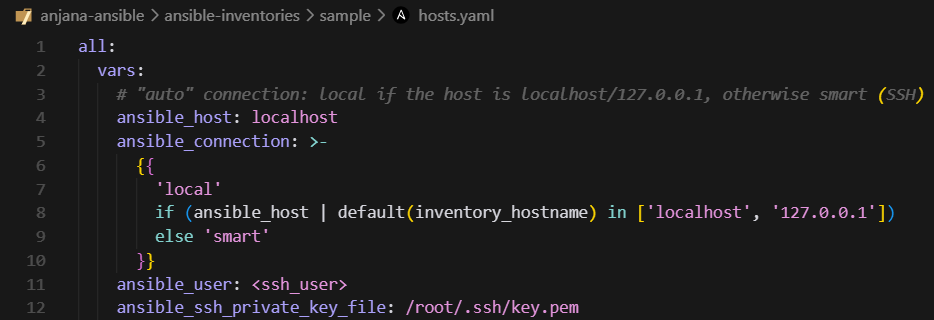
Infrastructure connection credentials:
-
anjana-platform nodes: it will be necessary to duplicate the entry for each instance present in the environment, adjusting the numbering and IP, keeping in mind that localhost refers to the instance where the ansible kit is being executed and does not need to be duplicated.
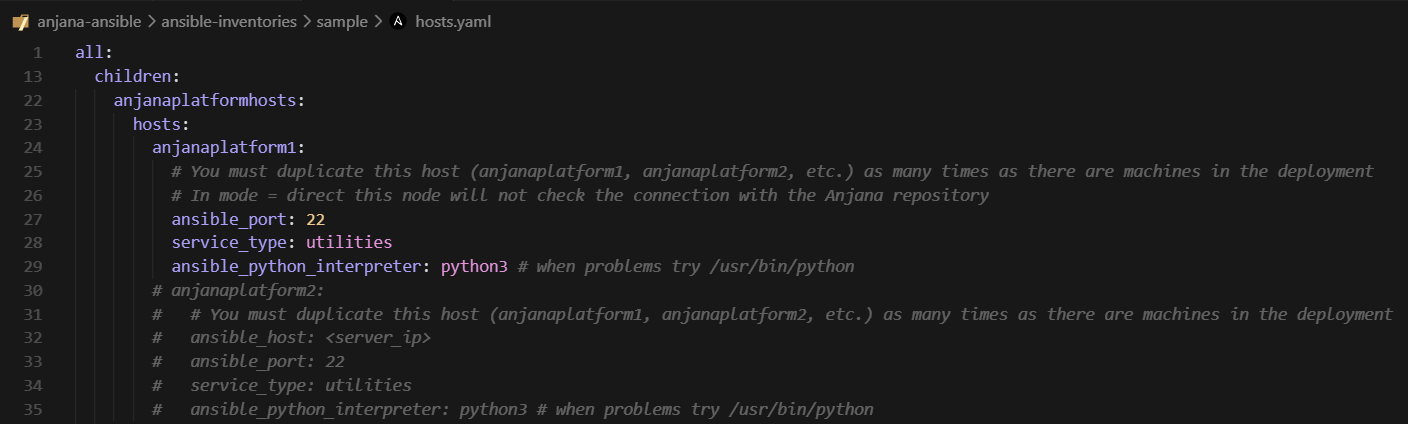
If the ansible kit has been placed outside the Anjana node and it is a Distributed environment, it is necessary to uncomment the anjanaplatform2 and fill it in with the core node data.
-
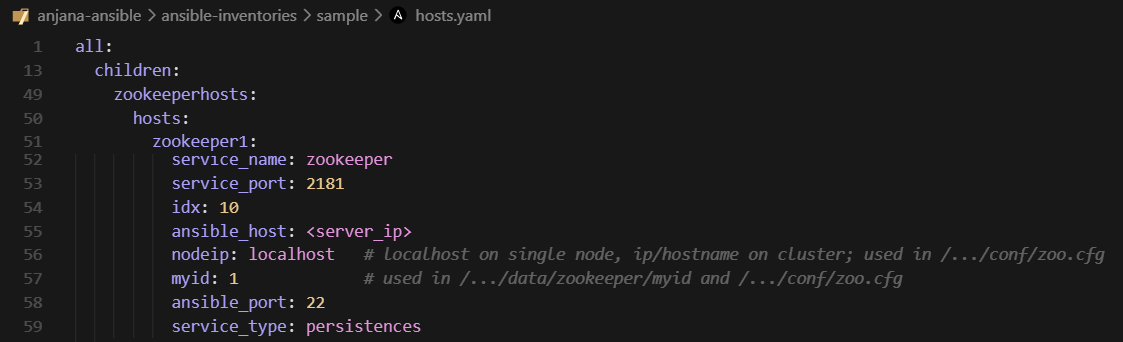
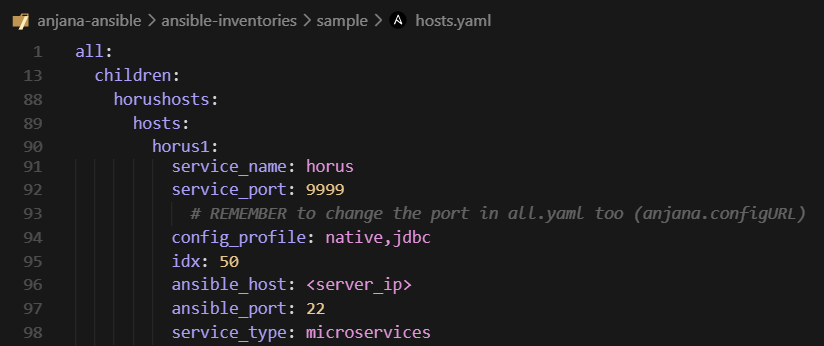
Remaining nodes: they will be adjusted according to the environment distribution and the descriptions in the file itself, indicating the IP corresponding to the actual instance in each node. Usage example: If there is more than one Zookeeper node, the entry must be duplicated.
-
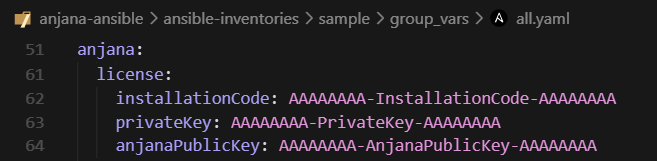
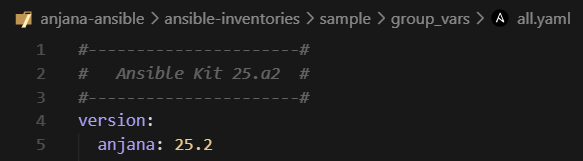
All environments: Common to all environment types, the license must be specified and adjusted in the following section of the all.yaml file, located at the path (by default) /opt/ansible/ansible-inventories/<inventory>/group_vars/all.yaml.
To learn about all available adjustable options, refer to the Annex - Advanced functionality.
If the Anjana environment is Distributed or Balanced, or if the ansible kit has been placed outside the Anjana node, it is necessary to launch the platform tag after making the necessary adjustments, to provision and configure all nodes in the deployment.
A sample hostsB.yaml file has been included, which contains the recommended number of nodes for a Balanced environment.
If it is to be used, it would only be necessary to replace the original hosts.yaml with this one.
anjana -t platform
Anjana Installation
After taking into account what was mentioned in the Requirements section, it will be necessary to review whether additional adjustments are required taking into account the Annexes Advanced functionality or Use Cases.
Once completed, to install Anjana, whether Singlenode, Distributed or Balanced, one of the following commands will be launched:
To install Anjana with sample data:
anjana -t anjana-sample
To install Anjana without sample data:
anjana
Once the installation is complete, the Anjana Data frontends can be accessed via the configured domain:
example.anjanadata.org/configpanel
Kit update and maintenance
Requirements
Required connectivity
It is assumed that the same connectivity mentioned earlier in the Required connectivity
section of Anjana Deployment is available.
General
-
It will be necessary to stop the Anjana environment using the command anjana -t stop as a prior step to updating the kit.
-
It will be necessary to remove the content of the previous Anjana command alias located in ~/.bash_aliases.
Ansible kit update
For updates from 25.1 or kit updates within version 25.a2, the following steps will be followed:
Running the setup script
(25.a2x and earlier)
The setup script incorporates an option to deploy on an existing environment, which allows performing the following actions:
-
Deletion of all existing ansible packages and subsequent installation of the updated ones.
-
Installation of packages and dependencies required for execution.
-
Backup of the existing kit, for deletion and download of the updated one.
-
Re-provisioning of the node where ansible is being executed (manager).
The setup script will require the following information:

-
Installation mode, new environment or existing Anjana environment.
-
Inventory, default is sample, but the existing inventory will be specified. It will NOT be possible to adjust it later by relaunching this script.
-
Informational message about the changes, to confirm that the process is to continue.
-
Credentials, previously requested from cs@anjanadata.com.
-
Domain, required for the frontend and communication between microservices.
-
Certificate, corresponding to the chosen domain in case it is to be specified manually.
-
Version, default is the most recent one corresponding to the setup script.
From 25.a2 the required certificate is automatically generated as self-signed by the installation.
If a public certificate is to be used, it needs to be placed in the /opt/common/anjana-certs/ directory on all instances that make up the Anjana environment.
The certificate should look like this:
After the script finishes, some helper commands will be displayed to continue with the update operation to 25.2.
Required inventory adjustments
It will be necessary to review the Required adjustments section of Anjana Deployment to find the missing steps that best fit the existing environment, whether Singlenode or Distributed/Balanced.
Configuration migration
(25.a2x and earlier)
In some cases it will be necessary to migrate configuration customizations from the previous kit installation to the new one, taking into account the following points to review.
In all.yaml:
-
Nexus access credentials
-
Persistence credentials (Solr, PostgreSQL/RDS, MinIO/S3)
-
Persistence hosts and ports (Solr, PostgreSQL/RDS, MinIO/S3)
-
Security update settings
From 25.a2, whenever connection strings are modified in the all.yaml, it will be necessary to re-provision in order to generate the updated environment variables file using the command anjana -t platform.
In hosts.yaml:
-
Connection credentials for instances.
-
IPs and/or domains belonging to the environment instances.
In anjanauihosts.yaml:
-
Apache2 security settings
-
Whitelist settings and entries
In templates:
-
Credentials in plugins.
-
Customizations in core and plugin configuration.
-
Customizations in core and plugin descriptors.
-
Customizations in apache2 configuration.
In 25.a2 all necessary configuration has been internalized within the microservices themselves.
Customizations outside the options managed by the kit that are not strictly necessary for the configuration and service descriptors of the Anjana core and its frontends (apache2) are discouraged.
Ansible kit maintenance
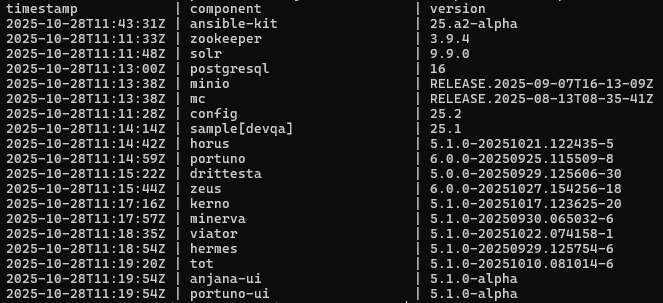
Version matrix
To track the versions installed in an environment, the file /opt/version-report is available by default.
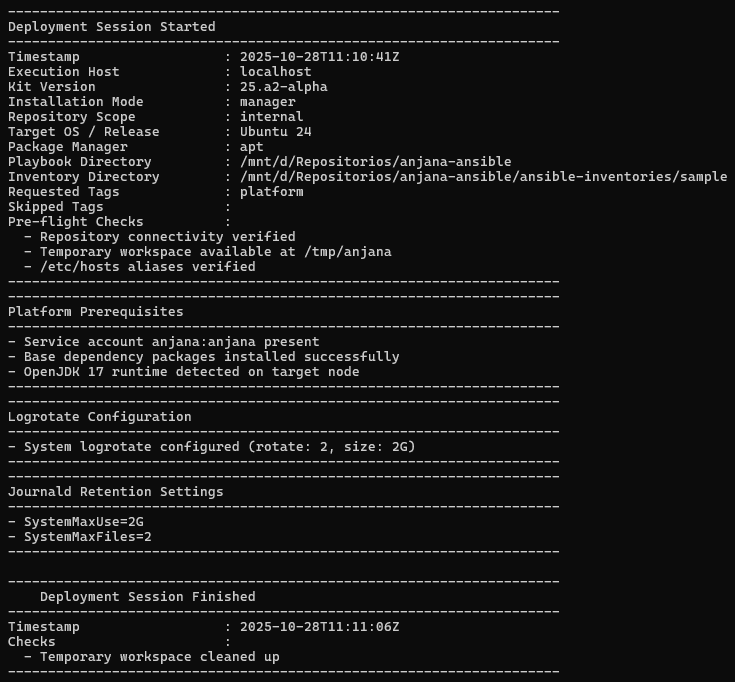
Logs
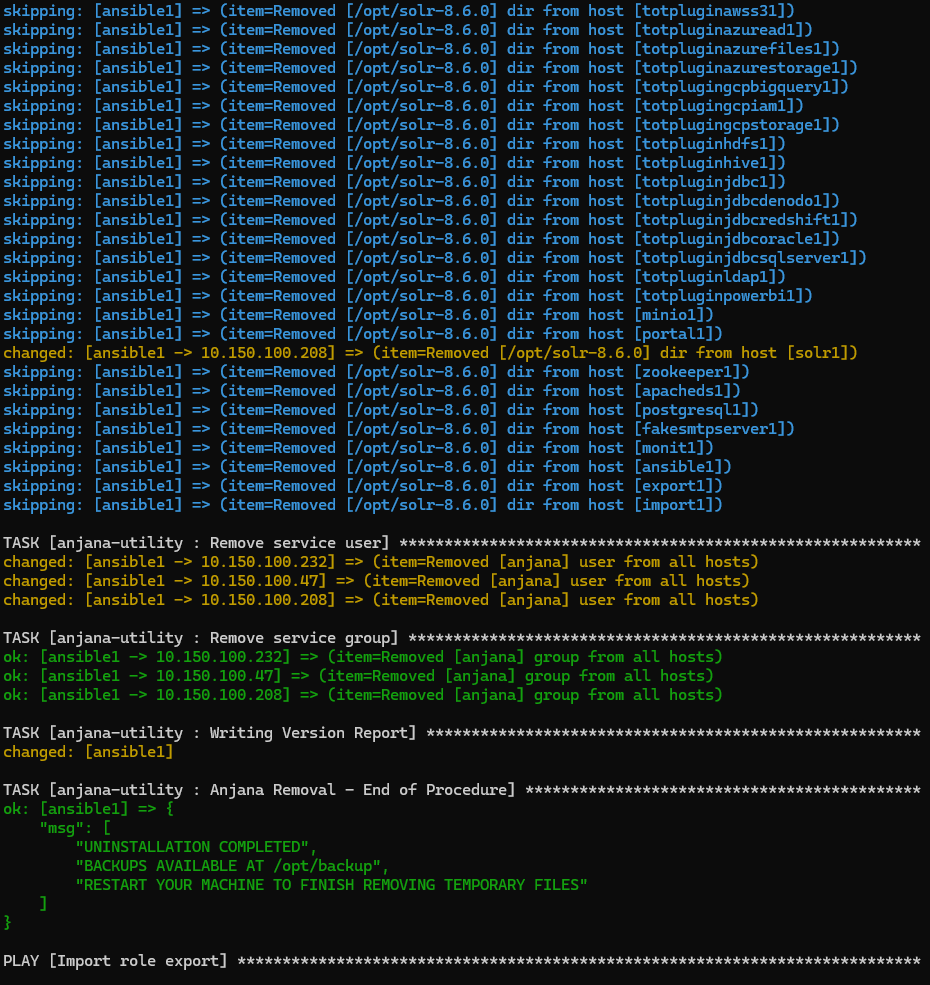
To track kit activity, the file /opt/deployment.log can be accessed by default.
The file records the actions and modifications executed in the environment, example below:
Anjana update and maintenance
Anjana update
The Anjana update can be carried out by running the following command:
anjana -t update
By default it will look for new available versions for the product version chosen in the all.yaml as shown below:
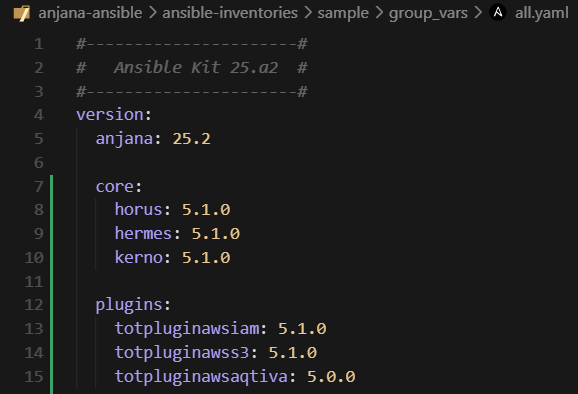
Specific versions can be set if you want to pin a microservice to a particular one, by specifying the microservice version as follows:
Anjana maintenance
Role and configuration import/deployment
It is possible to customize which roles are to be imported by editing the import_role section in the all.yaml and setting to true everything that is to be imported/deployed:

This way plugins or microservices can be added along with their respective configurations at a later stage. After adjusting the file, the configurations would be launched with:
anjana -t update-config
And the installation of microservices/plugins with:
anjana -t <microservicio>
anjana -t <plugin>
Configuration and services
It is possible to update and/or deploy the configuration of microservices as well as their descriptors when changes are made and it is necessary.
The utility will deploy only the configurations and/or descriptors of the roles that are marked for import in all.yaml, section import_role as indicated in the previous section Role and configuration import/deployment.
To deploy microservice and plugin configurations, the following tag is launched:
anjana -t update-config
To deploy frontend and apache2 configurations:
anjana -t update-vhosts
To deploy service descriptors:
anjana -t update-services
Environment start, stop and restart
It is possible to start and stop microservices selectively and in an ordered manner, thus avoiding errors arising from stopping a microservice without having taken its dependencies into account.
Usage example: stopping the backend to perform an Anjana upgrade.
The utility is compatible with multiple instances of the same microservice (e.g.: horus1, horus2, kerno1, kerno2, etc.) but cannot stop duplicate instances individually. Selecting the stop of kerno will stop kerno1 and kerno2 respectively.
The functionality provided by this utility is as follows:
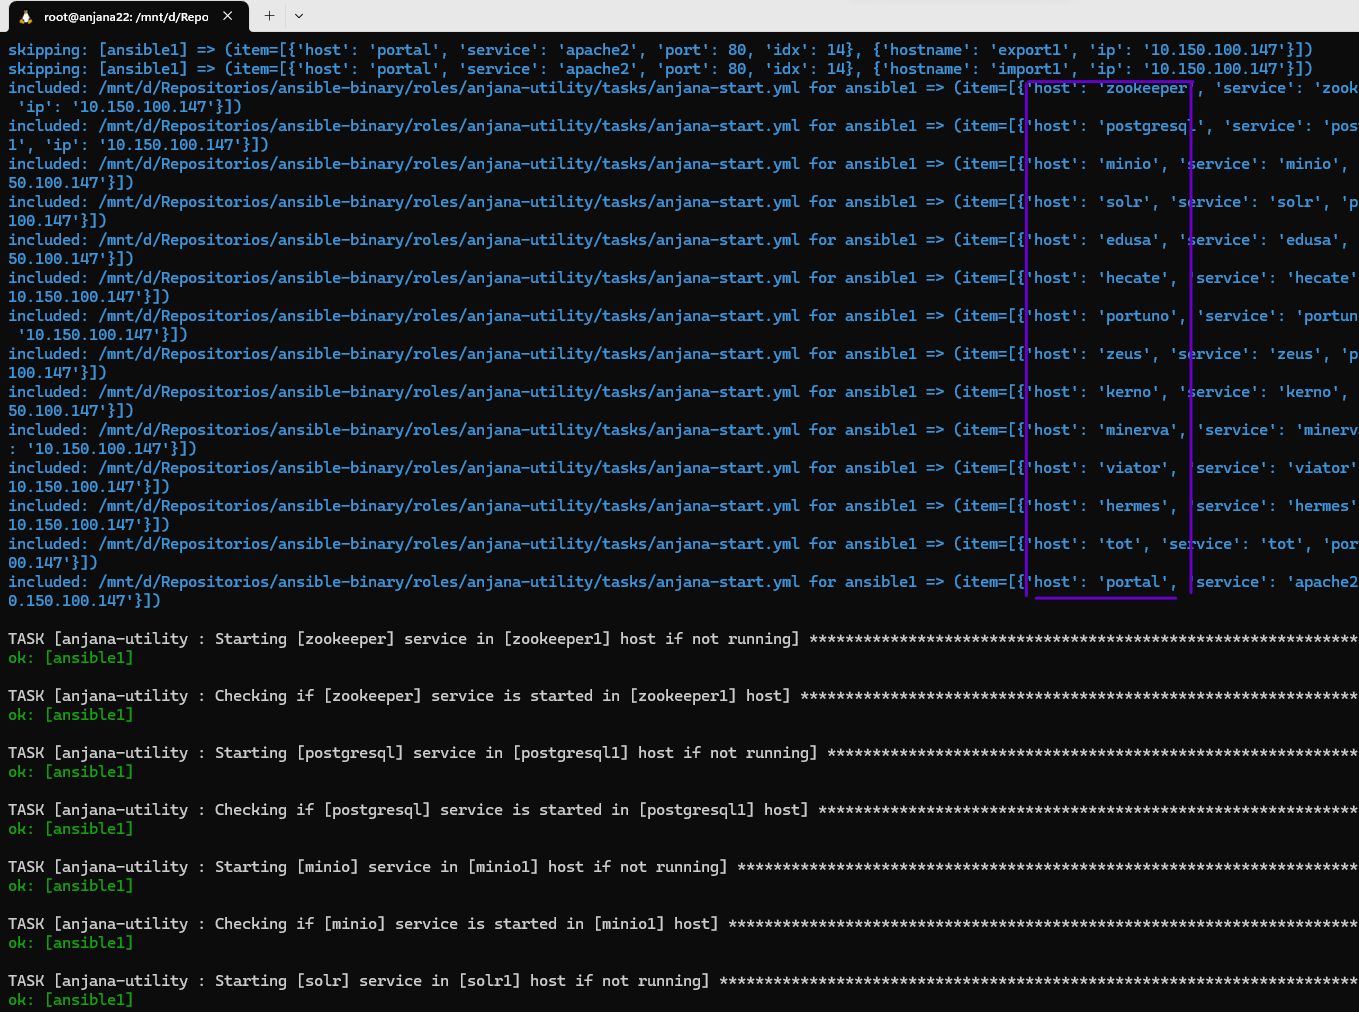
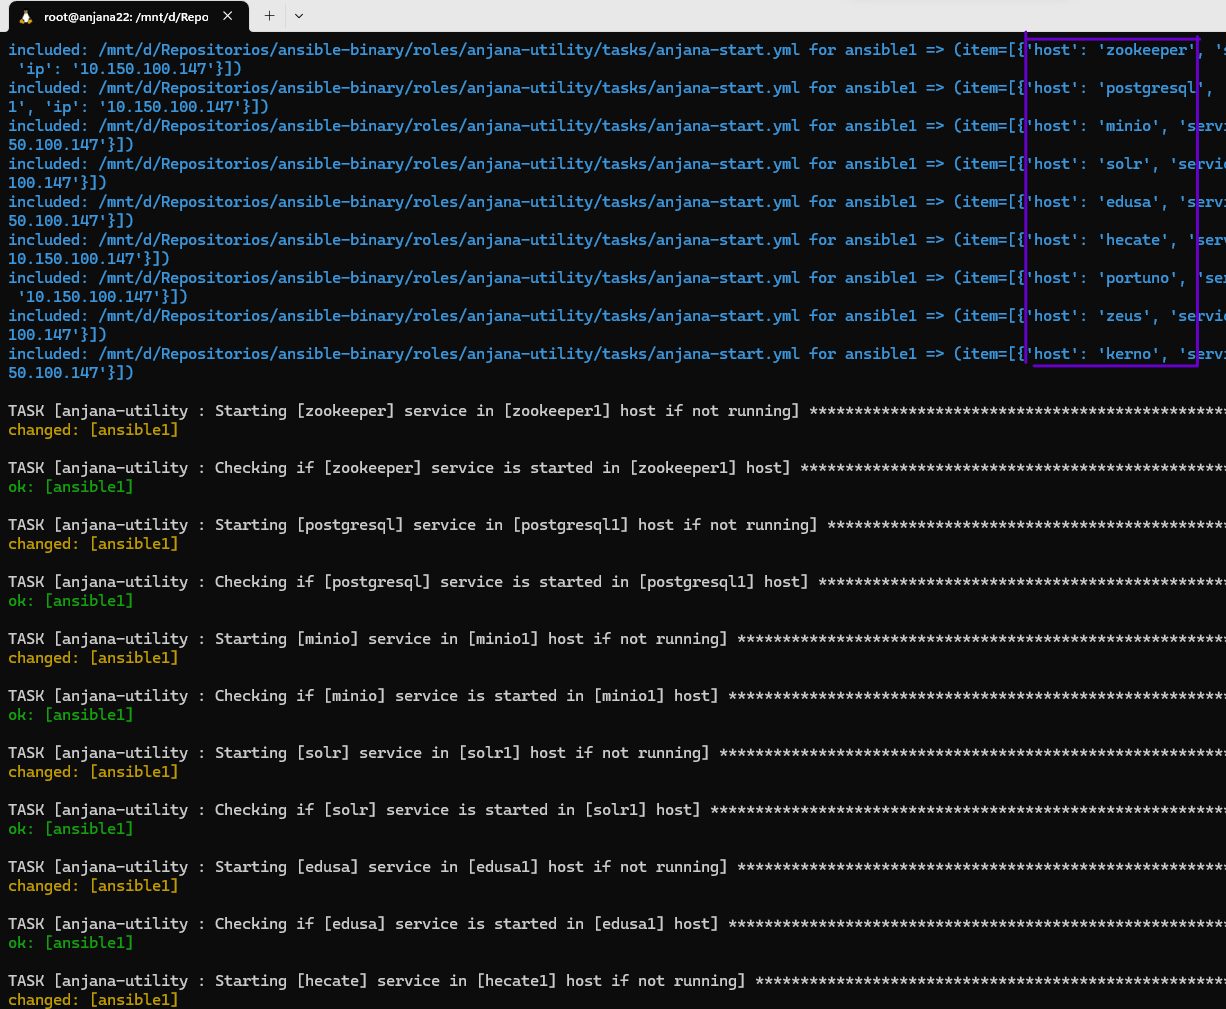
Ordered stop and start of all Anjana. It occurs in the proper order to avoid unintended exceptions.
anjana -t stop
anjana -t start
anjana -t restart
Selective stop and start of a specific microservice. All microservices required for the selected one to function will be started. In case of stop, all microservices that depend on the selected one will be stopped prior to the shutdown.
anjana -t stop-kerno
anjana -t start-kerno
Backups and restore
Allows making backups at the path indicated in the backup variable of each role, by default /opt/backups, of all persistences and configuration.
By default, during tasks involving data operations, or during updates, backups are performed automatically.
To perform manual backups, the following commands can be launched:
anjana -t backup
anjana -t backup-persistences
anjana -t backup-config
It is possible to restore persistence data and configuration using the restore tag or their respective individual tags:
anjana -t restore
anjana -t restore-s3
anjana -t restore-bbdd
anjana -t restore-config
Data migration
It is possible to export and import persistence data for transfer between machines/environments.
By default, the export and import paths are /opt/export-import.
It is necessary to set in the all.yaml file, the installation.mode: manager for this utility.
Connection strings such as ports, host, passwords, S3 client type, among others, for databases and MinIO and Solr can be located and edited in the all.yaml file of the inventory:
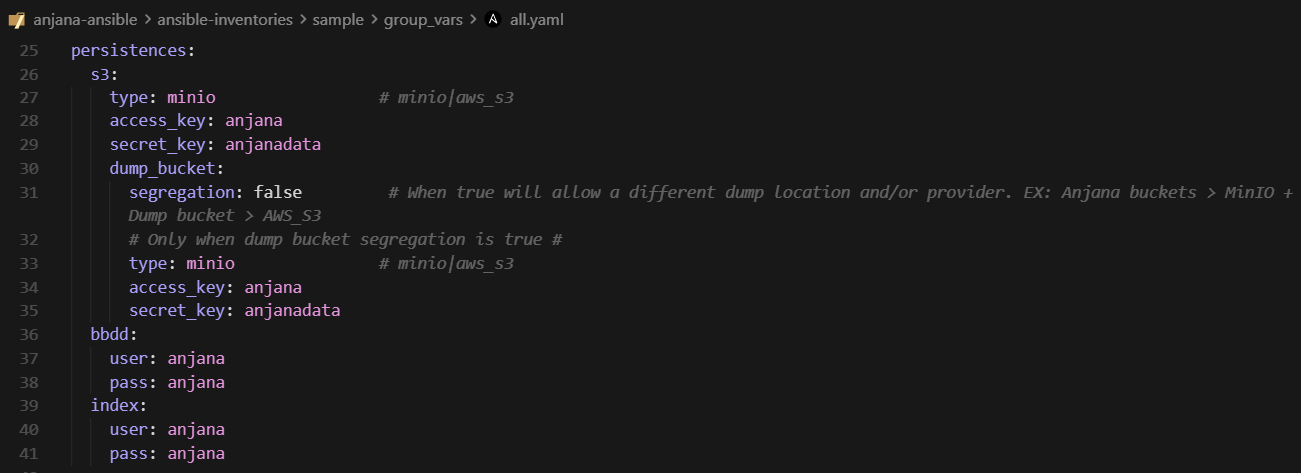
Note that the generated files will be deposited on the manager node, where ansible is being executed.
To export all data, use the command:
anjana -t export
If you want to include the configuration as part of the export and generate a compressed archive:
anjana -t clone
Similarly, for importing, use the import tag or its corresponding individual ones:
anjana -t import
anjana -t import-s3
anjana -t import-bbdd
For compressed data generated using the clone tag, to import use the deploy tag and its corresponding individual ones:
anjana -t deploy
anjana -t deploy-s3
anjana -t deploy-bbdd
anjana -t deploy-config
Status check
The ability to check the health status of all microservices, persistences and plugins included in the environment has been added through an endpoint located at /status.
When querying it, we can obtain information such as the following:
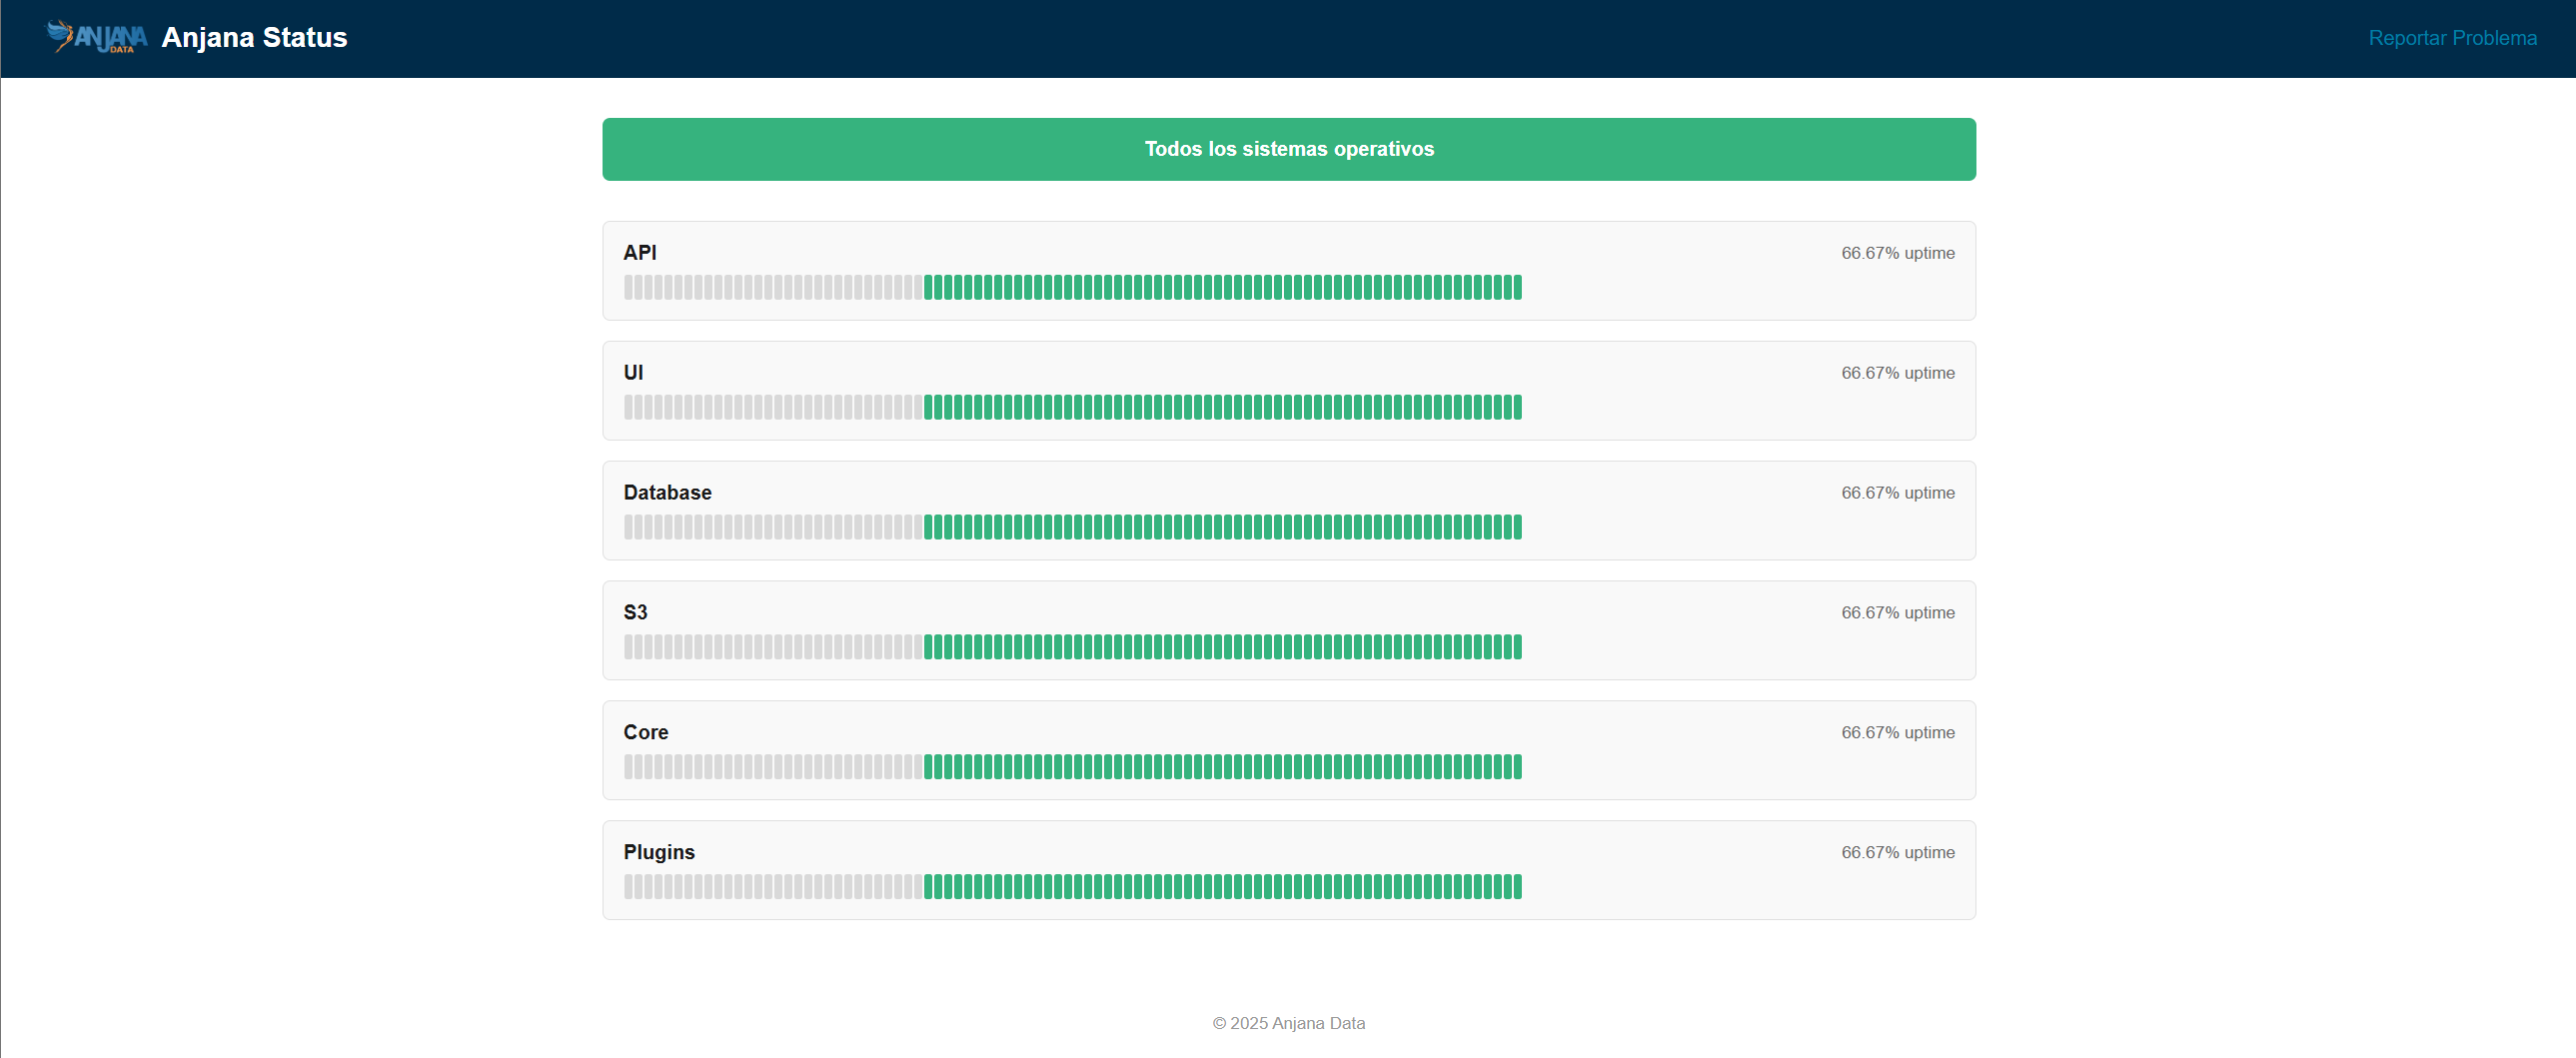
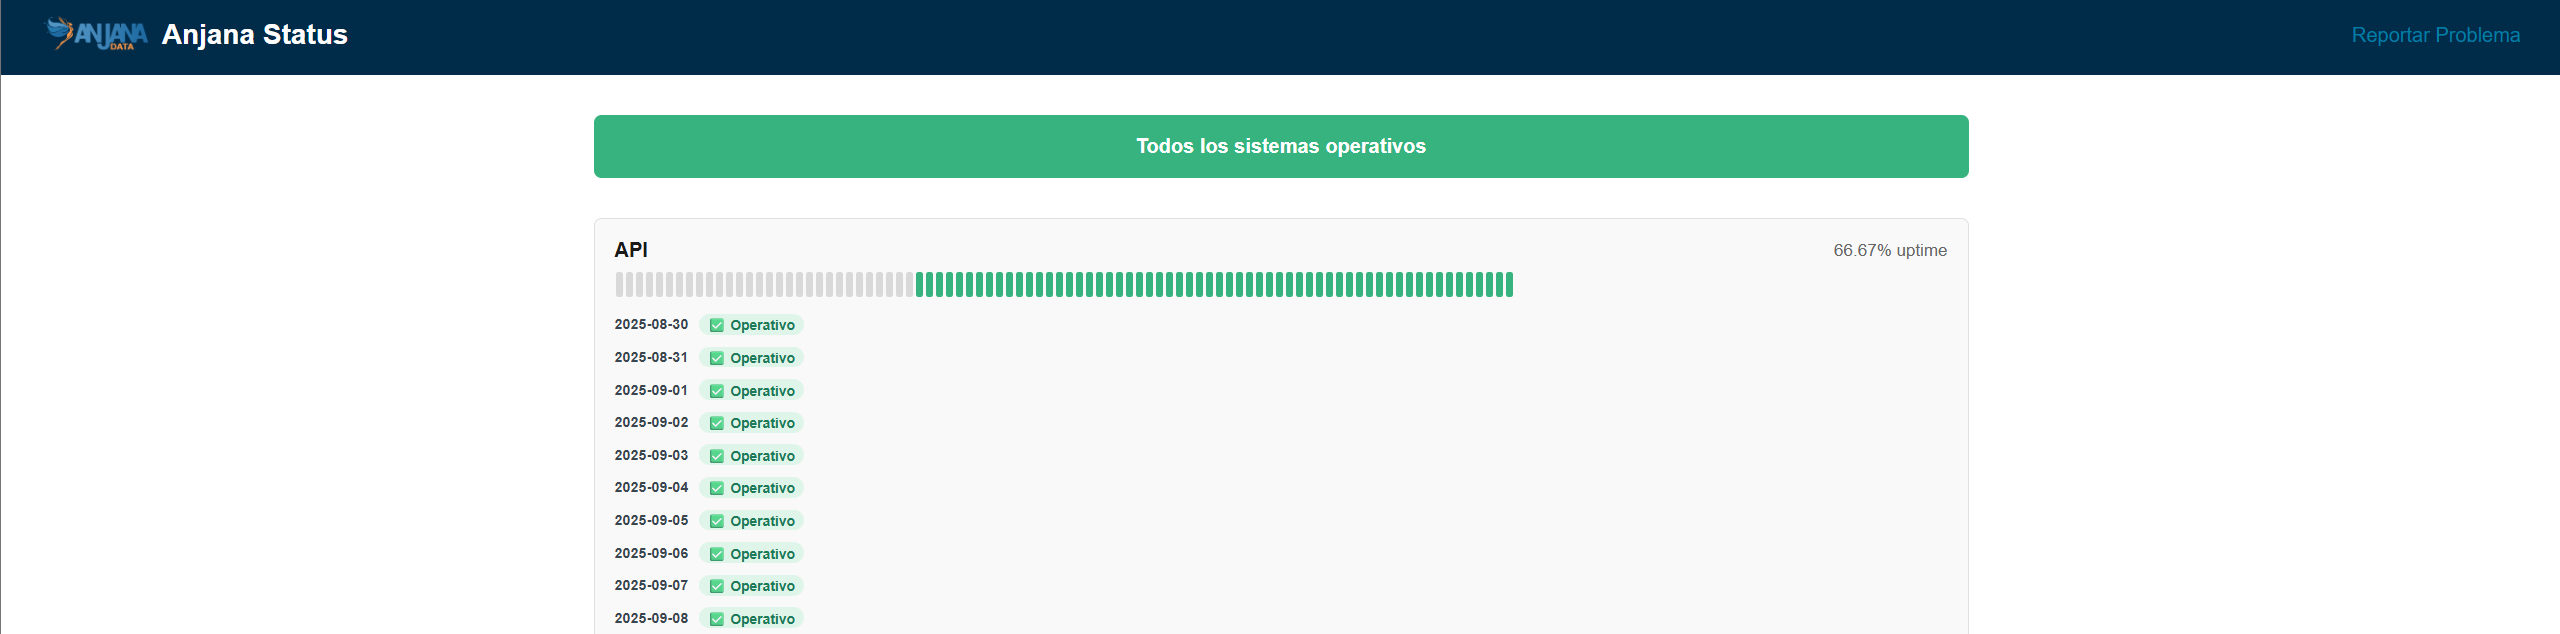
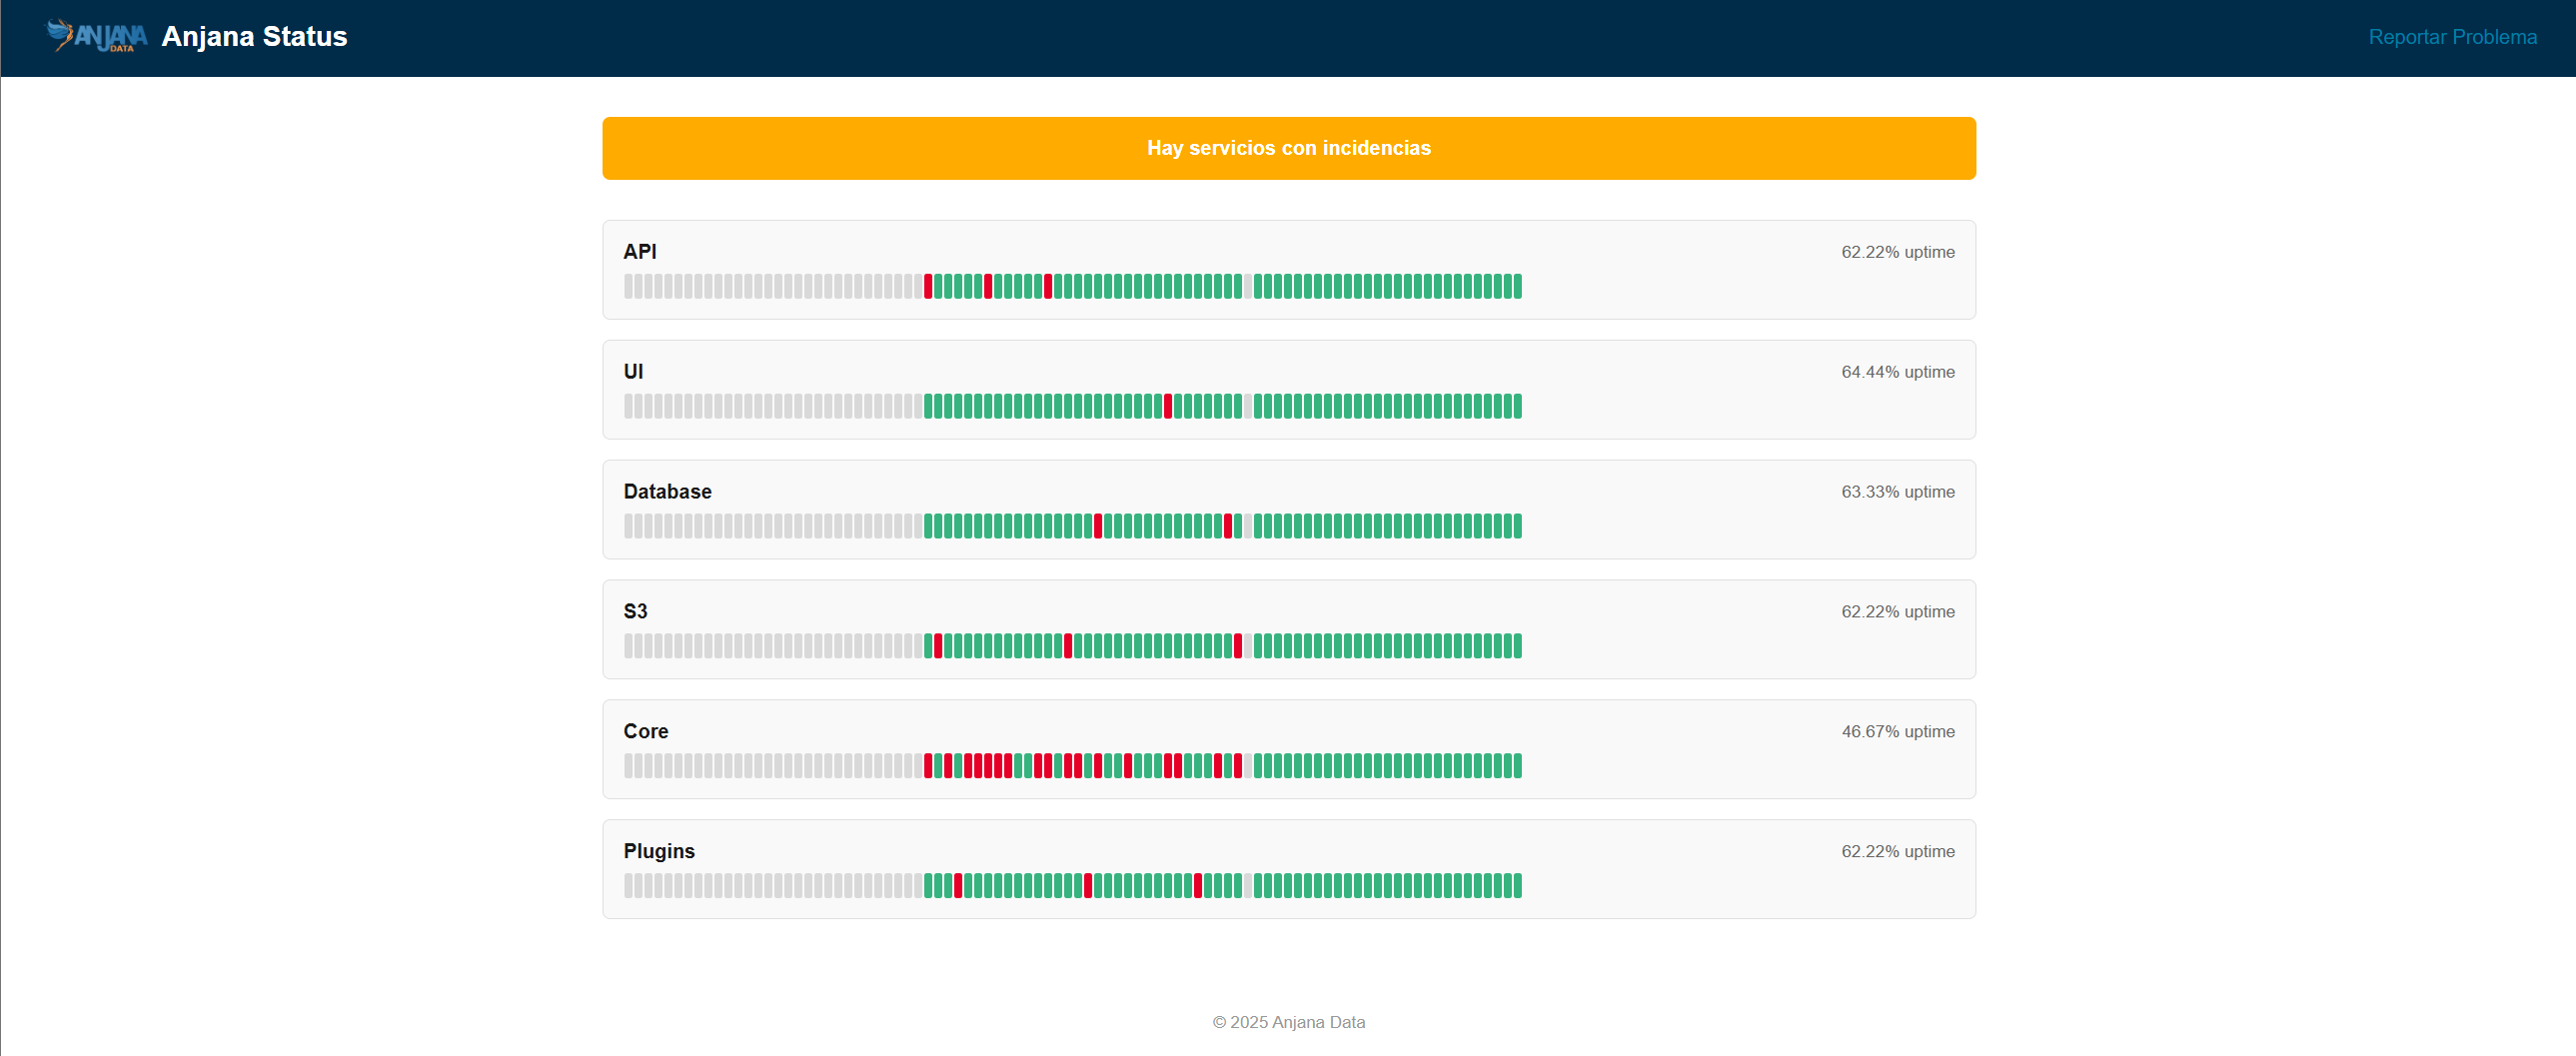
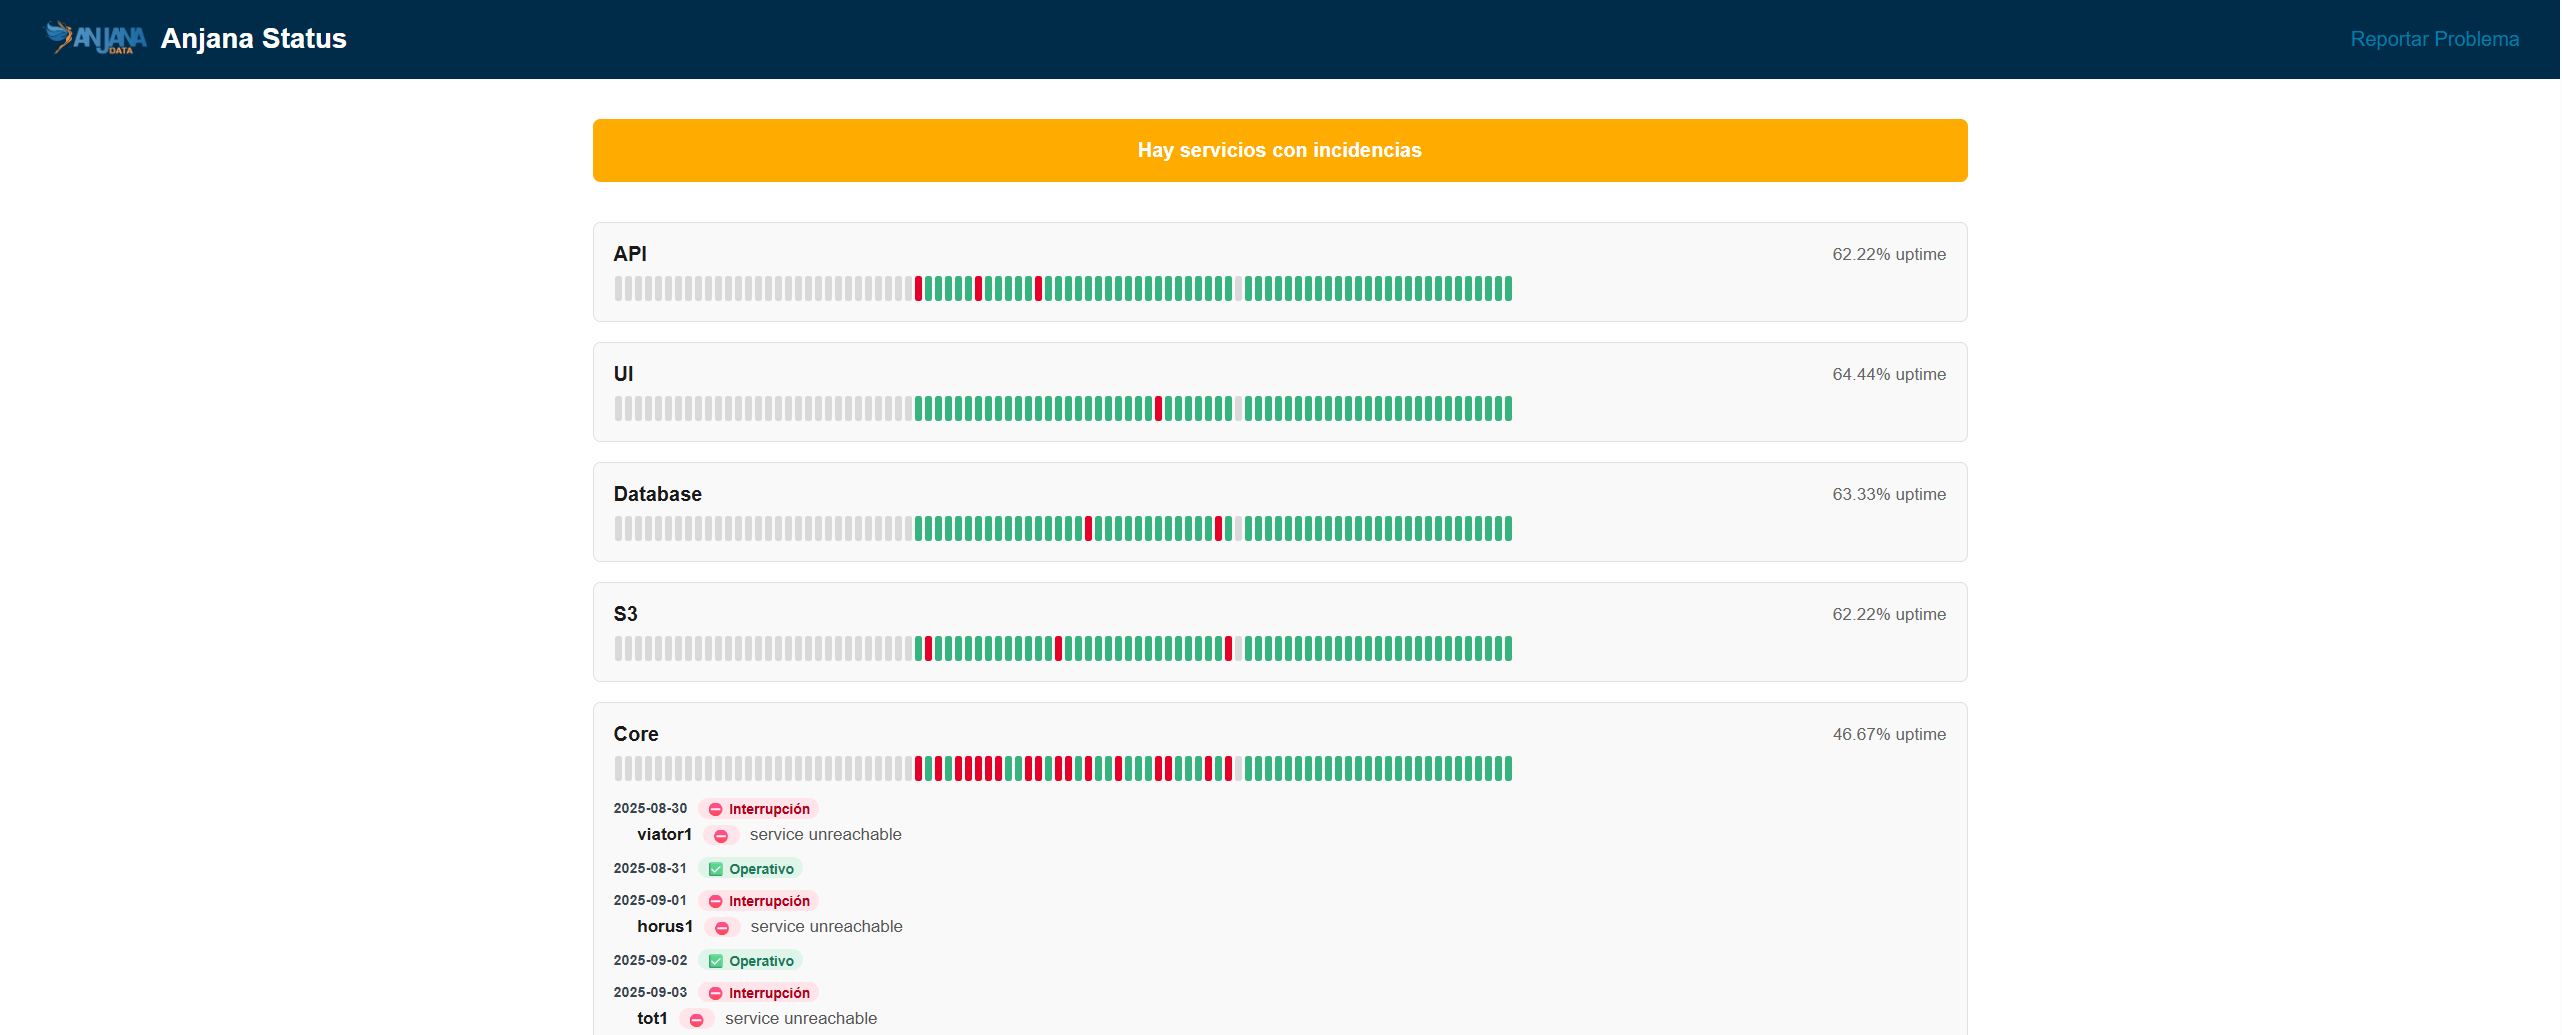
Recommended for quickly finding the application error point. For a more precise search, it will be necessary to consult the logs of the affected microservice, plugin or persistence.
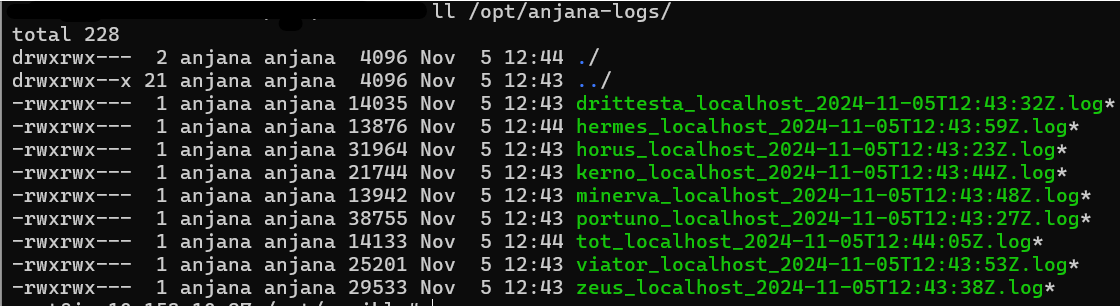
Microservice log export
It is possible to export Anjana microservice logs to the folder of each backend node, by default /opt/anjana-logs/<microservicio>.log.
Recommended for providing logs to the support team.
To perform the export, run:
anjana -t export-log
By default the last 5 days are exported but it is configurable at runtime:
anjana -t export-log -e '{"log": {"since": "2 day ago"}}'
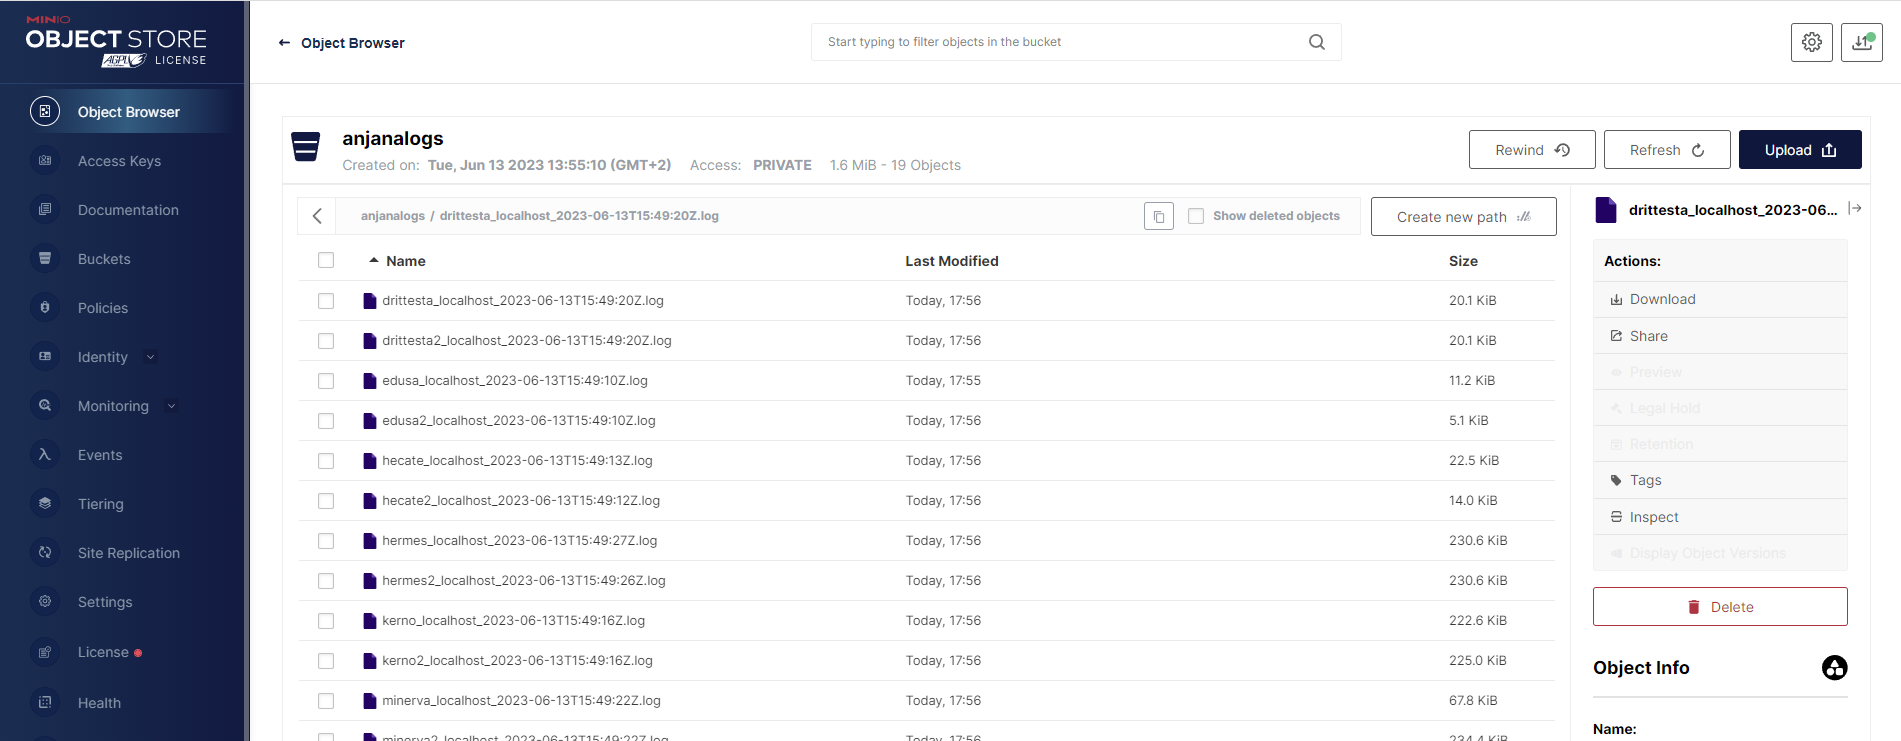
Logs can be uploaded to the S3 service or server configured in the all.yaml; by default they are uploaded to the anjanalogs bucket using the command:
anjana -t export-log-s3
It is necessary to set in the all.yaml file, the installation.mode: manager or local for this utility.
Uninstallation
A utility is included to proceed with the complete uninstallation of the product for the selected inventory.
The uninstallation respects the backups, export-import, ansible directories and the installation record files version-report and deployment.log, both located in the main Anjana folder (by default /opt).
To uninstall Anjana, run the following command:
anjana -t uninstall
For the uninstallation to proceed correctly, the inventory and its hosts.yaml file must be up to date according to the current environment, including: active machines, IPs, host names, ssh connection user, etc…